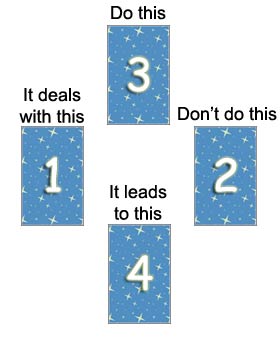
This easy-to-read four-card layout is one of the most useful of all the layouts. The first rune is the significator, and the last shows the outcome, provided that the advice given is followed. The advice is broken down into two runes which can easily be compared and contrasted. Rune #2 suggests what to avoid, while #3 shows the path to take.
This layout can also be used to ask about the meaning of a rune from a previously executed layout that may have been unclear. In this usage, Rune #2 shows what it did not mean, while #3 clarifies the meaning.
DO This Ingwaz |
||
It Deals with This Perthro |
Do NOT Do This Eihwaz |
|
It Leads to This Jera |

It Deals with This
The "Gambler's Rune" reversal warns that this is not a good time to take risks. Games of chance are not favoured. Do not give in to loneliness and despair.

Do not allow yourself to give in to confusion. That which you have built may be in jeopardy of crumbling. During times of weakness, we often discover what we are made of.

Ingwaz signifies completion, success, agriculture and fertility. You are firing on all cylinders. You will soon be able to realise your ambitions. Unification, peace, and harmony are in the air.

This rune literally means "year" and stands for the harvest of a good year's labours. It represents a permanent change for the better. Jera denotes fruitful, recurring cycles, and strong fertility.